
Breville Bread Machine Manual: A Comprehensive Guide
Discover the art of homemade baking with this detailed guide, offering insights into Breville’s machines and ensuring delightful, fresh bread every time, as of 03/24/2026․
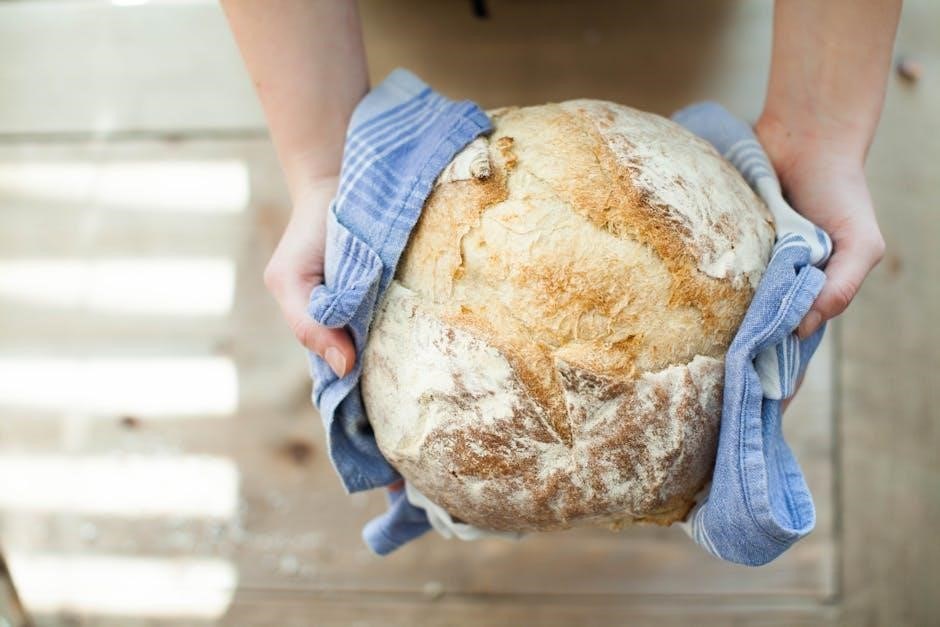
Breville bread machines represent a commitment to quality and convenience, bringing the joy of freshly baked bread into your home․ These appliances are designed to simplify the baking process, offering a range of automated programs for various bread types and dietary needs; Whether you’re a seasoned baker or a complete novice, a Breville bread maker empowers you to create delicious, wholesome loaves with minimal effort․
The appeal lies in the consistent results and the ability to customize recipes to your preferences․ As highlighted recently (03/24/2026), there’s a growing delight in homemade baking, and Breville machines cater to this trend․ This manual will guide you through every step, from initial setup to advanced techniques, ensuring you maximize your baking experience and enjoy the rewards of a warm, fragrant loaf․
Understanding Your Breville Model
Each Breville bread machine model boasts unique features, though core functionality remains consistent․ Familiarizing yourself with your specific model is crucial for optimal performance․ Refer to the model number (typically found on the base of the machine) to access tailored resources and support․ Different models offer varying loaf sizes, program options, and customization settings․
Understanding these nuances allows you to fully leverage the machine’s capabilities․ Recent discussions (dated 03/24/2026) emphasize the importance of reading the included documentation․ This manual serves as a companion, but your model’s specific guide provides detailed instructions and safety information․ Knowing your machine ensures delightful baking experiences and avoids potential issues․
Key Components and Their Functions
Breville bread machines comprise several essential components working in harmony․ The baking pan holds ingredients, while the kneading paddle mixes and develops gluten․ A heating element ensures even baking, and the housing provides insulation․ The lid contains the viewing window and ventilation․ Understanding each part’s role is vital for successful bread making․
The kneading paddle’s proper function is often discussed (as of 03/24/2026), impacting loaf texture․ Ensure it’s securely attached․ The baking pan requires non-stick coating maintenance․ Regular inspection of these components guarantees longevity and consistent results․ Familiarity with these parts empowers users to troubleshoot and maintain their machine effectively․
Control Panel Overview
The Breville bread machine’s control panel is your command center for baking․ It typically features a digital display screen showing cycle time and settings․ Buttons allow you to select pre-programmed cycles – like basic, whole wheat, or gluten-free – and adjust loaf size and crust color․ Indicators illuminate to show cycle status (kneading, rising, baking)․
Mastering the panel is key to customization (as of 03/24/2026)․ The ‘Start/Stop’ button initiates or halts the process․ A ‘Menu’ button navigates cycle options․ Understanding these controls unlocks the machine’s full potential, enabling you to create a diverse range of breads and baked goods with precision and ease․
Buttons and Indicators Explained
Each button on your Breville machine has a specific function․ The ‘Crust Color’ button cycles through light, medium, and dark settings, influencing the final bread’s exterior․ ‘Loaf Size’ selects between 1lb, 1․5lb, or 2lb loaves, adjusting ingredient proportions automatically․ The ‘Cycle Selection’ button scrolls through pre-set programs․
Indicators illuminate to signal operation status․ A kneading indicator shows when the dough is being mixed, while a rising indicator signals proofing․ The ‘Keep Warm’ indicator maintains bread temperature post-baking (as of 03/24/2026)․ Familiarizing yourself with these controls ensures accurate operation and optimal baking results․
Display Screen Information
The Breville bread machine’s display screen provides crucial information throughout the baking process․ It prominently shows the current cycle selected – Dough, Basic, Whole Wheat, etc․ – and the remaining time until completion․ A colon (:) separates hours and minutes, offering a clear countdown․
Additionally, the screen displays cycle stage indicators: Knead, Rise, and Bake, allowing you to monitor progress․ Error codes, if any, will appear here, signaling potential issues (as of 03/24/2026)․ Understanding these visual cues empowers you to adjust settings or troubleshoot effectively, ensuring perfect loaves consistently․
Getting Started: First-Time Setup
Before your inaugural bake, proper setup is essential․ Carefully unpack your Breville bread machine, removing all packaging materials․ Inspect for any damage incurred during shipping – report any issues immediately․ Thoroughly wash the bread pan and kneading paddle with warm, soapy water, ensuring complete removal of any residue․

Next, position the machine on a stable, level surface, away from water sources․ Plug it into a grounded outlet․ As of 03/24/2026, familiarize yourself with the control panel before proceeding․ This initial preparation guarantees optimal performance and longevity for your new appliance, setting the stage for delicious homemade bread․
Initial Cleaning and Preparation
Prior to the first use, a meticulous cleaning process is crucial․ Remove the bread pan and kneading paddle from the machine․ Wash both components in warm, soapy water; avoid abrasive cleaners that could damage the non-stick coating․ Rinse thoroughly and dry completely before reinserting․
Wipe down the exterior of the bread machine with a damp cloth․ Ensure no water enters the machine’s internal components․ As of 03/24/2026, this initial preparation eliminates any manufacturing residues and ensures a hygienic baking environment․ This step is vital for the purity of your first loaf and the machine’s overall performance․
Setting the Clock
Accurate timekeeping is essential for utilizing the delay timer function effectively․ Upon initial power-up, or after a power outage, the clock will likely need resetting․ Press the ‘Hour’ button to adjust the hour, and the ‘Minute’ button to set the minutes․ Hold the buttons for faster advancement․
Confirm your settings by pressing the ‘Start/Stop’ button․ The current date, as of 03/24/2026, isn’t typically set on Breville models, focusing primarily on time․ A correctly set clock ensures precise timing for pre-programmed cycles and delayed starts, guaranteeing fresh bread precisely when you desire it․
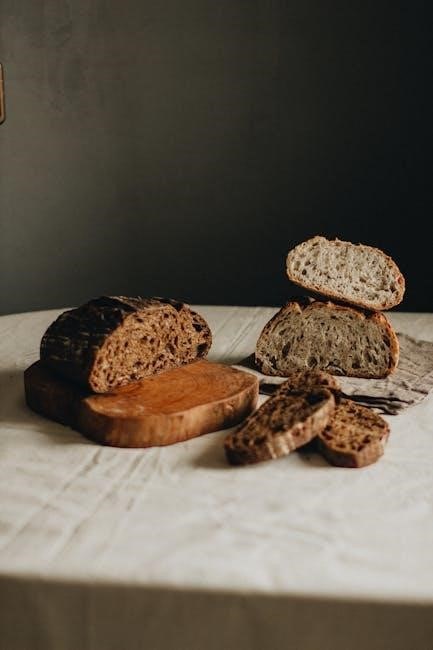
Basic Bread Making: The Standard Loaf
Embark on your bread-making journey with the standard loaf cycle – the foundation for all other recipes․ This cycle typically takes around three to four hours, encompassing kneading, rising, and baking․ Success hinges on precise ingredient measurement; utilize dry measuring cups and spoons for accuracy․
Remember, ingredient quality significantly impacts the final product․ As of 03/24/2026, fresh yeast is paramount․ Following a tested recipe is crucial for beginners, ensuring optimal results․ This initial experience builds confidence and understanding of the bread machine’s capabilities, paving the way for experimentation․
Ingredient Measurement and Quality
Accuracy in measurement is non-negotiable for consistent bread-making results․ Always use dedicated dry measuring cups and spoons – leveling off ingredients is essential․ Liquid measurements require liquid measuring cups, viewed at eye level․ Ingredient quality profoundly impacts the final loaf; fresh yeast, within its expiration date (as of 03/24/2026), is critical for proper rising․
Flour type also matters; bread flour provides the best structure․ Using the correct proportions, as outlined in your recipe, ensures a successful bake․ Don’t substitute ingredients without understanding the potential consequences on texture and taste․

Step-by-Step Standard Loaf Recipe
Begin by adding wet ingredients – water, oil, and sugar – to the bread pan․ Next, incorporate the dry ingredients: bread flour, salt, and instant yeast․ Ensure yeast doesn’t directly contact salt, as this can hinder activation (current date: 03/24/2026)․ Select the ‘Basic’ or ‘White Bread’ cycle on your Breville machine․ Choose your desired loaf size (1lb, 1․5lb, or 2lb) and crust color․
Press start and allow the machine to complete its cycle, typically around 3-4 hours․ Once finished, carefully remove the loaf and let it cool completely on a wire rack before slicing and enjoying your freshly baked bread!
Advanced Bread Making Techniques
Elevate your baking with Breville! Explore whole wheat bread, requiring adjustments for higher absorption; consider vital wheat gluten for improved rise (as of 03/24/2026)․ Gluten-free baking demands specialized flour blends and xanthan gum for structure․ Experiment with the ‘Rapid Bake’ cycle for quicker results, ideal when time is limited, though texture may differ;
Mastering these techniques unlocks a world of flavor and texture․ Remember, adjustments may be needed based on your specific Breville model and ingredient quality․ Consistent practice and careful observation are key to achieving baking perfection!
Whole Wheat Bread Recipes
Embrace the nutty flavor and health benefits of whole wheat! Breville machines excel at crafting hearty loaves․ Begin with a 50/50 blend of whole wheat and bread flour for easier handling, gradually increasing the whole wheat ratio․ Hydration is crucial; whole wheat absorbs more liquid, so add an extra tablespoon or two of water․
Consider incorporating honey or molasses for added moisture and sweetness․ Vital wheat gluten enhances the rise, counteracting whole wheat’s tendency to produce denser bread (as of 03/24/2026)․ Experiment with different varieties – white, red, or spelt – to discover your preference!
Gluten-Free Bread Recipes
Baking gluten-free bread requires a specialized approach․ Breville bread machines, with their dedicated gluten-free cycles, simplify the process․ Utilize a high-quality gluten-free bread flour blend, often containing rice flour, tapioca starch, and potato starch․ Xanthan gum is essential, acting as a binder to mimic gluten’s elasticity․
Ensure accurate measurements, as gluten-free baking is less forgiving․ A slightly wetter dough is preferable, aiding in a lighter texture․ Avoid over-kneading, as it can break down the starches․ As of 03/24/2026, explore recipes with psyllium husk for improved structure and crumb!

Rapid Bake Cycle – When to Use It
The Rapid Bake cycle on your Breville bread machine is ideal when time is limited․ This cycle significantly shortens the proofing and baking times, delivering a loaf in approximately half the standard duration․ However, be aware that this speed comes with a trade-off – the loaf’s texture may be slightly denser․
It’s best suited for simpler bread recipes, like white bread, where a perfectly airy crumb isn’t crucial․ As of 03/24/2026, avoid using the Rapid Bake cycle for complex doughs or recipes with numerous additions, as they may not fully develop․
Using Specialty Cycles
Breville bread machines offer a range of specialty cycles beyond the standard loaf, expanding your baking possibilities․ These cycles are pre-programmed to optimize conditions for specific recipes, ensuring consistent results․ Explore the Dough cycle for preparing pizza or roll doughs, providing perfectly kneaded bases without the baking step․
The Sweet Bread cycle caters to enriched doughs like brioche or challah, offering a longer proofing time for optimal rise․ As of 03/24/2026, the Jam cycle allows you to create homemade preserves, simplifying the process with automated temperature control and stirring․
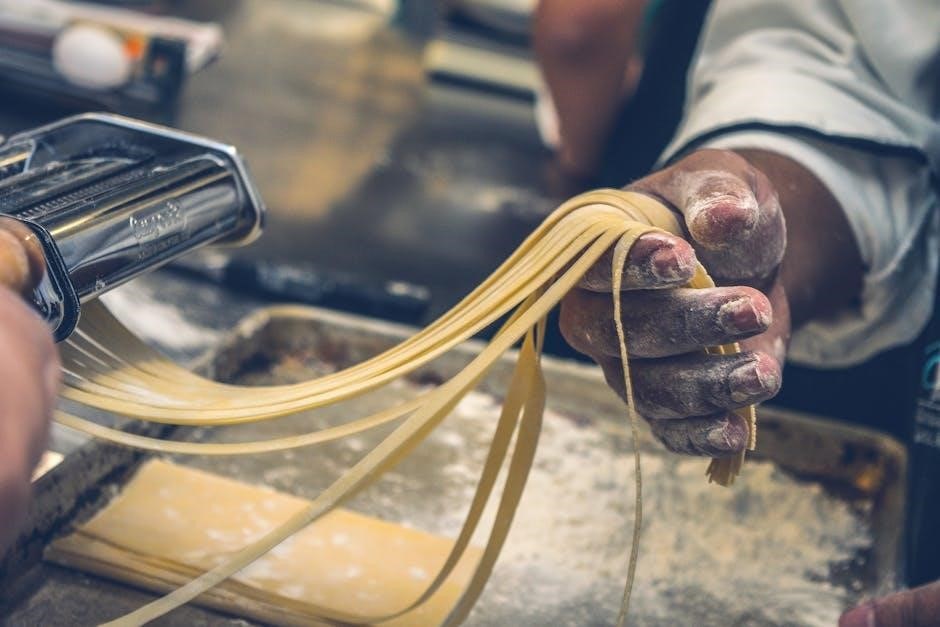
Dough Cycle – For Homemade Pizza & More
The Dough cycle on your Breville bread machine is a versatile tool for creating perfect doughs without baking․ Ideal for pizza, rolls, pretzels, and more, it handles the kneading and first rise, saving you valuable time and effort․ Simply add your ingredients, select the Dough cycle, and let the machine work its magic․
Remember to adjust ingredient quantities based on your recipe․ After the cycle completes, remove the dough and shape it as desired before baking in a conventional oven․ As of 03/24/2026, this cycle provides a consistent, well-developed dough, ready for your culinary creations!
Sweet Bread Cycle – Cakes & Desserts
Unlock a world of sweet possibilities with the Sweet Bread cycle! This setting is specifically designed for recipes containing higher sugar and fat content, crucial for cakes, brioche, and other delectable desserts․ The cycle utilizes a gentler kneading process and a longer rise time to ensure a light and fluffy texture․
Ensure ingredients are accurately measured, as sweetness levels significantly impact the outcome․ As of 03/24/2026, remember to check for doneness using a toothpick before removing your sweet creation․ Enjoy homemade treats with ease, thanks to your Breville machine’s specialized cycle!
Jam Cycle – Homemade Preserves
Create delicious, homemade preserves with the convenient Jam cycle! This function allows you to effortlessly craft flavorful jams, jellies, and preserves using fresh fruits and minimal effort․ The cycle automatically controls the heating and stirring process, preventing sticking and ensuring even cooking․
Remember to use a recipe specifically designed for bread machine jam making, as sugar content is vital for proper setting․ As of 03/24/2026, always follow safety guidelines when handling hot jam․ Enjoy the delightful taste of homemade goodness, perfectly paired with your freshly baked bread!
Troubleshooting Common Issues
Encountering problems? This section addresses frequent issues․ If your bread doesn’t rise, check the yeast’s expiration date and ensure proper liquid temperature․ A stuck paddle can often be resolved by allowing the loaf to cool completely before removal, as of 03/24/2026․

Decoding error codes is crucial; consult your model’s specific code list in the manual․ Don’t panic! Many issues have simple solutions․ Remember, ingredient quality and accurate measurements are key․ If problems persist, refer to the warranty information for support and potential repair options․
Bread Not Rising Properly
A common frustration is a loaf that fails to rise․ First, verify your yeast isn’t expired – old yeast is inactive․ Ensure liquids are lukewarm, not too hot or cold, as temperature impacts yeast activation, as of 03/24/2026․
Also, check the amount of sugar and salt; imbalances can inhibit yeast․ Overcrowding the machine can also hinder rising․ Finally, ambient temperature matters; a cold kitchen slows the process․ If issues persist, try a different brand of yeast to rule out quality concerns․
Paddle Stuck in Bread
Finding the kneading paddle embedded in your finished loaf is a frequent issue․ Typically, this happens with wetter doughs or when using the delay timer․ Ensure ingredients are measured accurately, especially liquids, as of 03/24/2026․
Consider using the “dough only” cycle for very wet recipes, then manually shaping and baking․ Allow the loaf to cool completely before attempting removal; a warm loaf is more prone to tearing․ Gently wiggle and rotate the paddle to dislodge it, avoiding excessive force that could damage the non-stick coating․
Error Codes and Their Meanings
Breville bread machines utilize error codes to signal issues during operation, as of 03/24/2026․ “Err 1” often indicates a power interruption or lid not securely fastened․ “Err 2” suggests a temperature sensor malfunction, requiring service․ “Err 3” typically means the kneading motor is overloaded – reduce dough ingredients․
“Err 4” signals a heating element problem, also needing professional attention․ Refer to your specific model’s manual for a complete list, as codes can vary․ Always unplug the machine before troubleshooting․ If an error persists after attempting solutions, contact Breville customer support for assistance and potential repair options․
Cleaning and Maintenance
Regular cleaning ensures optimal performance and longevity of your Breville bread machine, as of 03/24/2026․ After each use, unplug and allow the machine to cool completely․ Remove the kneading paddle and baking pan, washing them with warm, soapy water․ Avoid abrasive cleaners which can damage the non-stick coating․
Wipe the machine’s exterior with a damp cloth․ A deep clean should occur monthly, including the paddle and pan’s thorough washing․ Ensure all components are completely dry before reassembly․ Proper storage, covered and in a dry place, will protect your machine and maintain its functionality for years to come․
Daily Cleaning Procedures
Following each baking cycle, always unplug your Breville bread machine and allow it to cool completely before commencing cleaning, as of 03/24/2026․ Carefully remove the baking pan and kneading paddle․ Wash both items in warm, soapy water, ensuring all bread residue is removed․ Avoid using abrasive sponges or scouring pads that could scratch the non-stick surfaces․
Wipe down the exterior of the machine with a soft, damp cloth․ Pay attention to any crumbs or spills․ Ensure the heating element area remains dry․ Properly drying all components before reassembly prevents mold and ensures optimal performance for your next baking adventure․
Deep Cleaning Schedule
For a thorough clean, schedule a deep cleaning approximately once a month, or more frequently with heavy use, as of 03/24/2026․ Disassemble the baking pan and paddle completely․ Inspect for any stubborn baked-on residue and soak in warm, soapy water for an extended period․ The baking pan may be dishwasher safe – consult your model’s manual for confirmation․
Carefully wipe down the interior of the bread machine, avoiding the heating element․ Use a slightly damp cloth with mild detergent․ Ensure all surfaces are completely dry before reassembling․ This prevents corrosion and maintains optimal baking conditions, extending the life of your Breville appliance․
Storage Instructions
When not in use, ensure your Breville bread machine is completely cool, dry, and clean, as of 03/24/2026․ Store it in a cool, dry place, away from direct sunlight and extreme temperatures․ Avoid storing it in damp environments, which can cause corrosion․ If possible, store the machine in its original packaging to protect it from dust and accidental damage․
Coil the power cord loosely and secure it to prevent tangling․ Detach the baking pan and paddle and store them separately to avoid scratching the non-stick coating․ Proper storage will help maintain the machine’s performance and longevity․

Safety Precautions
Always ensure the bread machine is placed on a stable, heat-resistant surface, away from flammable materials, as of 03/24/2026․ Never immerse the appliance, cord, or plug in water or other liquids․ Do not operate the machine with a damaged cord or plug․ Keep children away during operation, as surfaces become hot․
Exercise caution when handling the baking pan and paddle after use, as they will be hot․ Unplug the machine before cleaning and allow it to cool completely․ Never attempt to repair the machine yourself; contact qualified service personnel for assistance․ Follow all instructions carefully to prevent injury․
Warranty Information
Breville offers a limited two-year warranty against defects in materials and workmanship, effective from the date of purchase, as of 03/24/2026․ This warranty covers normal household use and does not extend to damage resulting from misuse, abuse, or unauthorized repairs․
To claim warranty service, proof of purchase is required․ Breville will, at its discretion, repair or replace the defective appliance․ The warranty is void if the appliance is altered or if non-genuine parts are used․ See the full warranty details included with your product or visit the Breville website for complete terms and conditions․