
The “Check Headlamp System” warning indicates a potential issue with your vehicle’s headlamp system. It may appear due to faulty bulbs‚ blown fuses‚ or electrical component malfunctions.
Understanding the “Check Headlamp System” Error Message
The “Check Headlamp System” error message appears when your car’s computer detects an issue with the headlamp system. This warning can be triggered by faulty headlamp bulbs‚ blown fuses‚ or problems with the headlamp control module. It may also indicate loose connections‚ moisture intrusion‚ or wiring issues. In some cases‚ the error might occur even if the headlights appear to be working normally. The message serves as a prompt to inspect the system thoroughly to ensure proper functionality and safety; Always consult your vehicle’s owner’s manual for specific guidance‚ as the diagnostic process may vary depending on the make and model of your car. Addressing this issue promptly can prevent further complications and maintain optimal lighting performance.
Importance of Addressing the Warning
Addressing the “Check Headlamp System” warning is crucial for ensuring your safety and the safety of others on the road. Ignoring this alert can lead to reduced visibility‚ increasing the risk of accidents‚ especially at night or in low-light conditions. Additionally‚ unresolved issues may cause further damage to the headlamp system‚ leading to more costly repairs. Faulty headlamps can also result in electrical system malfunctions or even fires if left unattended. Regular maintenance and prompt repairs help maintain optimal vehicle performance and prevent potential legal issues related to non-compliant lighting. Always prioritize resolving this warning to ensure your car operates safely and efficiently.
Initial Steps to Diagnose the Issue
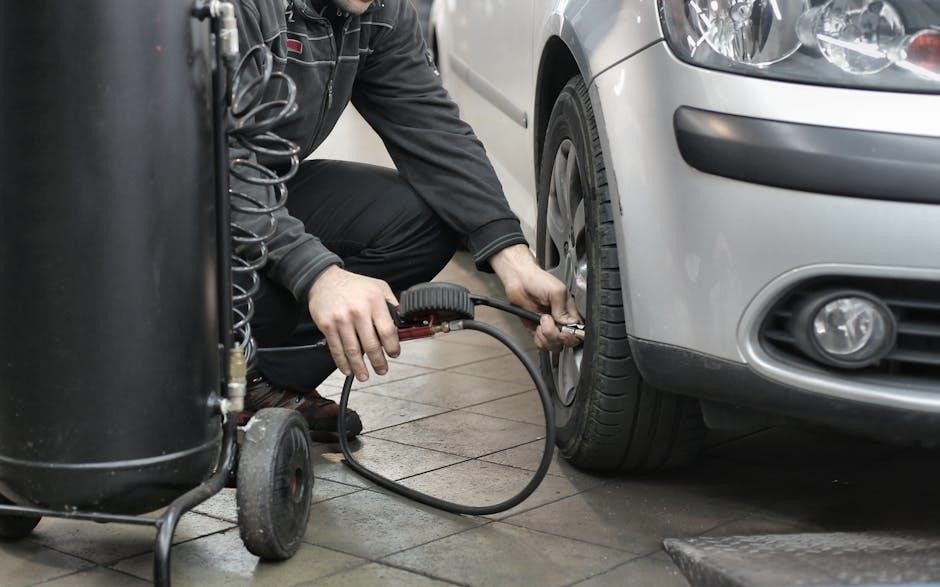
Start by checking the headlamp bulbs for visible damage or wear. Consult the owner’s manual for guidance. Inspect the fuse box and test the headlamp switch functionality. Use basic tools to identify loose connections or blown fuses. These initial steps help narrow down potential causes before advanced troubleshooting.
Visual Inspection of the Headlamp Bulbs
A visual inspection is the first step in diagnosing headlamp issues; Check for cracks‚ broken glass‚ or discoloration in the bulbs. Ensure the bulbs are securely seated in their sockets to prevent movement. Clean the lenses with a soft cloth to remove dirt or haze that might reduce light output. Look for signs of moisture inside the headlamp assembly‚ as this can indicate a seal failure. Verify that the bulb type matches the manufacturer’s specifications‚ as incorrect bulbs can cause system malfunctions. If any damage or wear is found‚ replacement may be necessary. Always consult the owner’s manual for specific guidance on accessing and inspecting the headlamp components on your particular vehicle.
Consulting the Vehicle’s Owner’s Manual
Consulting the vehicle’s owner’s manual is a crucial first step when encountering the “Check Headlamp System” warning. The manual provides specific guidance tailored to your vehicle’s make and model. It outlines the location of headlamp components‚ such as fuses‚ relays‚ and bulbs‚ and explains how to access them. Additionally‚ the manual may include troubleshooting steps or diagnostic procedures recommended by the manufacturer. Familiarize yourself with the headlamp system’s operation and any model-specific features. This resource can help you identify potential causes of the warning and guide you through initial checks. Always refer to the manual before attempting repairs to ensure compliance with manufacturer instructions and safety protocols.

Checking the Headlamp Fuse and Relay
Checking the headlamp fuse and relay is a straightforward step to identify potential issues. Locate the fuse box‚ typically found under the hood or inside the vehicle‚ as specified in the owner’s manual. Identify the headlamp fuse by referring to the diagram or list provided. Remove the fuse using the fuse puller tool and inspect it for signs of damage‚ such as a broken filament or discoloration. If the fuse is blown‚ replace it with one of the same amperage rating. Additionally‚ check the headlamp relay‚ often located near the fuse box. Test the relay by swapping it with a functioning one of the same type. If the issue persists‚ further diagnostics may be required.

Detailed Diagnostic Procedures
Advanced testing methods‚ such as using a multimeter to check voltage and continuity‚ help identify deeper electrical issues. Always consult the manual for specific procedures.
Testing the Headlamp Bulbs for Damage or Wear
Begin by turning on the headlights and inspecting both low and high beams for any dimming or flickering‚ which may indicate a failing bulb. Ensure both headlamps are functioning equally. If one bulb is out‚ replace it with the correct type specified in the manual. Check for visible damage‚ such as cracks or discoloration‚ which can affect light output. Use a multimeter to test the bulb’s resistance if unsure. Always handle bulbs carefully to avoid oil from your skin causing premature failure. If both bulbs appear intact‚ proceed to check fuses‚ relays‚ or wiring for potential issues. Regular bulb inspections can prevent unexpected failures and maintain road safety.
Inspecting the Headlamp Fuse Box and Wiring
Locate the headlamp fuse box‚ typically found in the engine compartment or under the dashboard‚ as specified in the vehicle’s manual. Open the fuse box and identify the headlamp circuit using the diagram provided. Remove the fuse and inspect it for signs of damage or blowing. If the fuse is damaged‚ replace it with one of the correct amperage rating. Next‚ examine the wiring connected to the fuse box and headlamps for any visible damage‚ corrosion‚ or rodent bites. Use a multimeter or test light to check for continuity and voltage supply. Ensure all connections are secure and free from rust. If issues persist‚ consult the manual for further troubleshooting steps or consider professional assistance.
Using a Multimeter to Test the Headlamp Connector
Connect the multimeter to the headlamp connector to verify electrical connectivity and voltage supply. Set the multimeter to the “continuity” or “voltage” mode‚ depending on the suspected issue. Test the connector pins for any open circuits or short circuits by probing each terminal. Ensure the multimeter is properly grounded to avoid inaccurate readings. If the headlamp is supposed to be powered on‚ check for the presence of voltage at the connector. A lack of voltage may indicate a blown fuse‚ faulty relay‚ or wiring issue. Conversely‚ unexpected voltage could signal a short circuit. Document the findings and refer to the manual for wiring diagrams to trace the electrical path. This step helps pinpoint whether the problem lies in the connector‚ wiring‚ or another component.
Verifying the Headlamp Switch and Dimmer Functionality
To verify the headlamp switch and dimmer functionality‚ start by testing the switch in all positions‚ including parking lights‚ low beam‚ and high beam. Ensure the dimmer operates smoothly‚ transitioning between light levels without hesitation. Check if the headlights respond correctly to each switch position. If the dimmer feels loose or the switch sticks‚ it may need replacement. Use the owner’s manual to locate the switch and dimmer components. Test the dimmer by gradually adjusting it while observing the headlamp brightness. If the lights flicker or fail to adjust‚ the dimmer or switch could be faulty. Ensure all functions work consistently with the ignition and lights turned on. Any irregular behavior indicates a potential issue requiring attention. Always refer to the manual for specific testing procedures for your vehicle’s make and model.

Advanced Troubleshooting Techniques
Advanced troubleshooting involves examining headlamp system control module for software issues or damage. Use multimeter or scan tool to detect faults; consult professional if unresolved.
Examining the Headlamp Control Module
The headlamp control module is a critical component that regulates the entire headlamp system. Begin by accessing the module‚ typically located under the dashboard or in the engine compartment. Inspect for visible damage‚ corrosion‚ or water intrusion. Use a scan tool to check for fault codes stored in the module’s memory. If codes are present‚ address them according to the manufacturer’s guidelines. Ensure the module’s software is up-to-date‚ as outdated software can cause system malfunctions. If issues persist‚ consult a professional to reprogram or replace the module if necessary. Always refer to the vehicle’s manual for specific instructions tailored to your model.
Checking for Loose or Corroded Connections
Loose or corroded connections can disrupt the headlamp system‚ triggering the warning. Start by inspecting the headlamp connectors‚ wiring harnesses‚ and bulb sockets for signs of wear or oxidation. Use a multimeter to test the resistance and continuity of the connections. Clean any corrosion using a wire brush or electrical cleaner. Ensure all plugs and sockets are securely fastened. Pay attention to grounding points‚ as poor grounding can mimic other faults. If a connection is damaged beyond repair‚ replace it with an OEM or equivalent part. Always consult the vehicle’s manual for specific locations and procedures. Addressing these issues can resolve the warning and restore proper headlamp functionality.
Testing the Headlamp Alignment and Auto-Leveling System
To test the headlamp alignment and auto-leveling system‚ ensure the vehicle is on a level surface with the fuel tank half full. Turn on the headlamps and check their alignment using a flat surface or alignment tools. If equipped with an auto-leveling feature‚ consult the manual for specific instructions. Some systems may require calibration after bulb replacement or suspension modifications. Use a multimeter to verify the sensor inputs and outputs if the system is electronic. Misaligned headlamps can cause uneven light distribution‚ while a faulty auto-leveling system may not adjust properly. Correcting these issues ensures proper illumination and safety on the road‚ while also clearing the warning if it was triggered by misalignment or sensor malfunctions.

Common Causes of the “Check Headlamp System” Warning
The warning often arises from faulty bulbs‚ blown fuses‚ or damaged wiring. Moisture intrusion and corroded connections can also trigger the alert‚ requiring immediate attention to ensure safety.
Faulty or Burned-Out Headlamp Bulbs
Faulty or burned-out headlamp bulbs are among the most common causes of the “Check Headlamp System” warning. Over time‚ headlamp bulbs can degrade due to heat‚ moisture‚ or excessive use‚ leading to dimming‚ flickering‚ or complete failure. Halogen bulbs‚ in particular‚ are prone to burnouts‚ while LED bulbs‚ though more durable‚ can still malfunction. If one or both bulbs fail‚ the headlamp system detects the issue and triggers the warning. Ignoring this can result in reduced visibility while driving‚ increasing the risk of accidents. It’s essential to inspect and replace faulty bulbs promptly to restore proper headlamp function and eliminate the warning. Always refer to the vehicle’s manual for guidance on replacement procedures.
Blown Fuses or Faulty Relays
A blown fuse or a faulty relay is another common reason for the “Check Headlamp System” warning to appear. The headlamp system relies on electrical circuits protected by fuses and controlled by relays. If a fuse blows due to an overload or short circuit‚ or if a relay fails to function properly‚ the headlamp system can malfunction. This disrupts power supply to the bulbs‚ causing the warning to illuminate. Identifying and replacing the faulty fuse or relay can often resolve the issue. Consult the owner’s manual to locate the relevant fuse box and test the components using a multimeter. Addressing this promptly ensures proper headlamp operation and safety on the road. Regular inspection of electrical components can help prevent such issues.
Moisture or Water Intrusion in the Headlamp System
Moisture or water intrusion in the headlamp system is a common issue that can trigger the “Check Headlamp System” warning. Water entering the headlamp assembly can cause fogging‚ corrosion‚ or short circuits‚ disrupting the electrical connections. This often occurs due to cracks in the headlamp lens‚ improper sealing‚ or exposure to harsh weather conditions. If left unaddressed‚ moisture can damage bulbs‚ wiring‚ or control modules. To resolve this‚ inspect the headlamp for signs of water ingress‚ dry the components thoroughly‚ and repair or replace any damaged seals or parts. Regular cleaning and inspection can help prevent moisture-related issues. Addressing this problem promptly ensures reliable headlamp functionality and safety while driving. Always refer to the owner’s manual for specific guidance on handling moisture in your vehicle’s headlamp system.

Preventative Measures and Maintenance
Regular maintenance is crucial to avoid headlamp system issues. Clean lenses‚ inspect wiring‚ and replace worn parts promptly. Refer to your manual for specific maintenance schedules.
- Clean headlamp lenses regularly to ensure optimal light output.
- Inspect and replace worn-out bulbs or components before they fail.
- Check wiring and connections for damage or corrosion.
Regular Cleaning and Inspection of Headlamp Components
Regular cleaning and inspection of headlamp components are essential for maintaining optimal visibility and safety. Dirt‚ grime‚ and moisture can accumulate on lenses‚ reducing light output and increasing the risk of accidents. Use a soft cloth and mild soap to clean headlamp lenses‚ ensuring no scratches or damage occur. Inspect bulbs for signs of wear‚ discoloration‚ or cracks‚ as these can indicate impending failure. Check the glass for hazing or yellowing‚ which may require professional restoration. Additionally‚ examine the headlamp assembly for loose screws or misalignment. Regular maintenance helps prevent system malfunctions and ensures the headlamps function correctly‚ reducing the likelihood of the “Check Headlamp System” warning appearing. Always refer to your vehicle’s manual for specific cleaning and inspection guidelines.
Replacing Worn or Damaged Headlamp Parts
Replacing worn or damaged headlamp parts is crucial for ensuring proper illumination and safety. If a headlamp bulb is burned out or damaged‚ it should be replaced immediately. Use the correct type and wattage of bulb specified in your vehicle’s manual to maintain performance. Similarly‚ cracked or hazy lenses should be replaced to restore clarity and prevent further damage. Faulty fuses‚ relays‚ or wiring components must also be addressed promptly. Always purchase genuine or high-quality replacement parts to ensure reliability; Proper installation is essential to avoid future issues‚ so refer to your manual for step-by-step instructions. Regularly replacing worn parts helps maintain your headlamp system’s efficiency and prevents the “Check Headlamp System” warning from recurring.
Ensuring Proper Wiring and Connection Integrity
Proper wiring and connection integrity are vital for the headlamp system to function correctly. Over time‚ wires and connectors can become loose‚ corroded‚ or damaged‚ leading to the “Check Headlamp System” warning. Inspect the wiring harness for any signs of wear‚ cuts‚ or fraying. Clean or replace corroded connectors to ensure good electrical contact. Use a multimeter to test for continuity and voltage drops in the circuits. Secure all connections firmly to prevent intermittent issues. If moisture is present‚ ensure the wiring is properly sealed and protected. Regularly checking and maintaining the wiring system can prevent faults and keep your headlamp system operating reliably. Always refer to your vehicle’s manual for specific wiring diagrams and procedures.

Addressing the “Check Headlamp System” warning promptly ensures safety and prevents further damage. Always consult your vehicle’s manual for specific guidance and recommendations.
Start by visually inspecting headlamp bulbs for damage or wear. Check the fuse box and relays for blown fuses or faulty connections. Consult the owner’s manual for specific error codes or guidance. Test the headlamp bulbs using a multimeter to ensure proper voltage and resistance. Inspect wiring and connectors for signs of damage‚ corrosion‚ or moisture. Verify the functionality of the headlamp switch and dimmer to rule out electrical issues. If issues persist‚ examine the headlamp control module and alignment system. Always refer to the manual for model-specific instructions and troubleshooting steps. Addressing these areas systematically helps identify and resolve the root cause of the warning efficiently.
When to Seek Professional Assistance
If the “Check Headlamp System” warning persists after performing basic diagnostics‚ it may indicate a complex issue requiring professional expertise. Seek assistance if you encounter faulty headlamp control modules‚ advanced wiring problems‚ or suspected moisture intrusion. Professional mechanics have specialized tools‚ such as OBD scanners‚ to identify underlying issues. Additionally‚ if you’re unsure about handling electrical systems or advanced components‚ consulting a certified technician is advisable. They can ensure proper repairs‚ preventing further damage or safety hazards. Don’t hesitate to seek help if the problem is beyond your DIY capabilities‚ as improper fixes can lead to more severe issues. Professional assistance guarantees accurate diagnoses and reliable solutions for the headlamp system warning.

Additional Resources and References
- Consult your vehicle’s repair manual for specific diagnostic procedures.
- Visit manufacturer websites for updated technical service bulletins.
- Explore online forums for real-world solutions and advice.
- Utilize OBD-II code readers for detailed system insights.
Recommended Tools for Headlamp System Diagnosis
For diagnosing the “Check Headlamp System” warning‚ essential tools include a multimeter‚ OBD-II scanner‚ and LED bulb tester. A wiring diagram specific to your vehicle is crucial for tracing circuits. A screwdriver set and torque wrench are needed for disassembling headlamp assemblies. A fuse puller and circuit tester can help identify blown fuses or faulty relays. Additional tools like an infrared thermometer may detect overheating components. Optional tools include a headlamp alignment kit for adjusting aim and a CAN-bus analyzer for advanced system monitoring. Always refer to your vehicle’s repair manual for tool specifications. These tools will help pinpoint issues efficiently and ensure accurate repairs.
Online Guides and Repair Manuals
For resolving the “Check Headlamp System” warning‚ online guides and repair manuals are invaluable resources. Manufacturer websites often provide detailed troubleshooting steps and wiring diagrams specific to your vehicle. Forums like Reddit or specialized automotive communities offer real-world solutions from experienced technicians. Platforms like ALLDATA or Autozone Repair Help provide access to professional diagnostic procedures and repair manuals. YouTube tutorials and DIY blogs can guide you through visual inspections and repairs. These resources often include step-by-step instructions‚ error code explanations‚ and tips for testing components like fuses‚ relays‚ and bulbs. By leveraging these tools‚ you can identify issues confidently and perform repairs effectively‚ ensuring your headlamp system functions properly.